In this guide, we will explain what Optimization Groups are, why we use them, and then walk you through the process of setting them up in your account so that you can benefit from the full capabilities of the Bid Optimizer.
Optimization Groups are a unique feature in the platform which offer a distinctive capability: Enabling you to organize your campaigns into customized categories of your choice.
You can think of these like Portfolios or Tags for your campaigns, only these groupings are going to inform the algorithm even further, making all of your optimizations custom to the groupings you set in place.
How you set up the Optimization Groups will be incredibly important in helping you get the results you want.
Generally, most users like to group campaigns based on a combination of the following:
1️⃣ Product/Product Categories - i.e. a supplement brand that sells Creatine, Whey Protein and Pre-Workout might group the campaigns for each of those products into parent groups.
2️⃣ Tactic - Brand, Non-Brand, Competitor
3️⃣ Goal/Strategy - i.e. Profitability, Ranking, Research
4️⃣ Target ACOS - i.e. Brand targeting campaigns will likely have a lower ACOS target than Non-Brand or Competitor campaign so perhaps you take that into consideration in your optimization group setup.
To get started with Optimization Groups, you must first ensure that you are a Pro subscriber to AdLabs, as this feature is exclusively available in the Pro version.
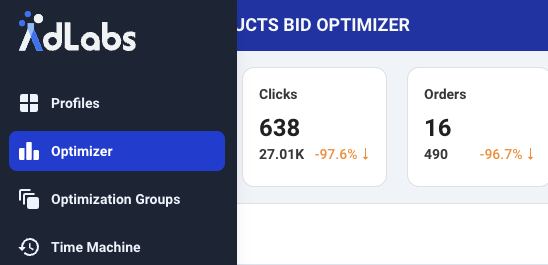
1️⃣ Once inside the app, you can navigate to the Optimizer tab in the side bar menu.
2️⃣ From the Campaign table, you can begin utilizing the filters to narrow your campaigns down to the ones you want to group.

You can use multiple filters to help you narrow your search down to only the campaigns you want to select by clicking the Adjust Filters button.

You can also simply scroll and select the campaigns if you choose not to utilize the filters.
3️⃣ If using the filters, once you have narrowed your search to the intended campaigns, use the Select All button to select those campaigns.

If you have chosen to scroll through your campaigns and individually select them without using the filters, you can simply move on to Step 4.
💡 Note: You can only ever add one given campaign to one optimization group.
4️⃣ Next, click the Optimization Groups button.

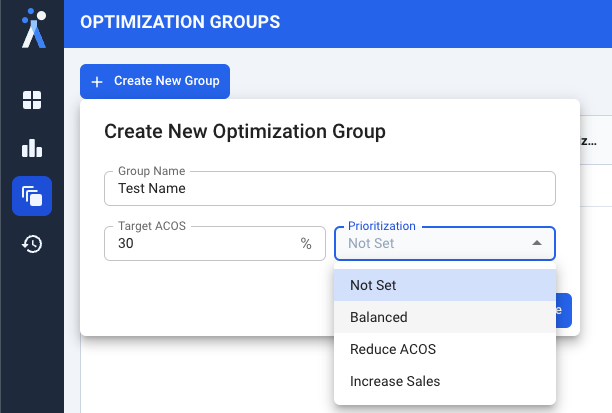
You will then be prompted to Name the group, set your target ACOS, and choose the prioritization and goal for this group of campaigns, whether it be Increase Sales, Balanced, or Reduce ACOS.
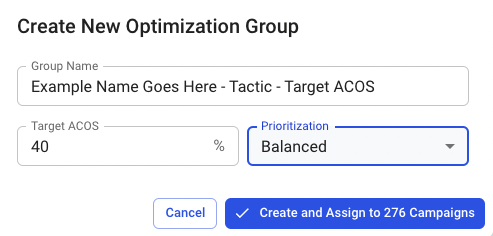
These settings will be important, so be sure to set these realistically and somewhat in-line with the current performance you've been getting.
Alternatively, if you prefer to set up all of your Optimization groups first, and then add campaigns to pre-created groupings, you can follow the step-by-step guide below:
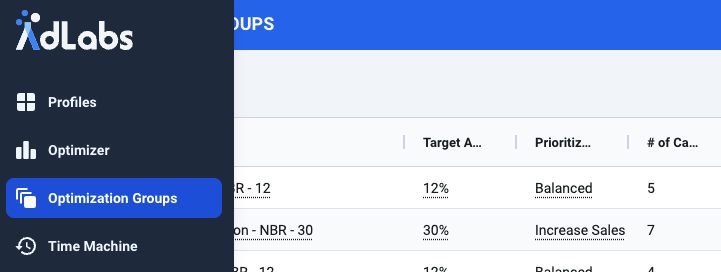
1️⃣ Once inside the app, you can navigate to the Optimization Groups tab in the side bar menu.
2️⃣ Click "Create New Group" to open the creation window.
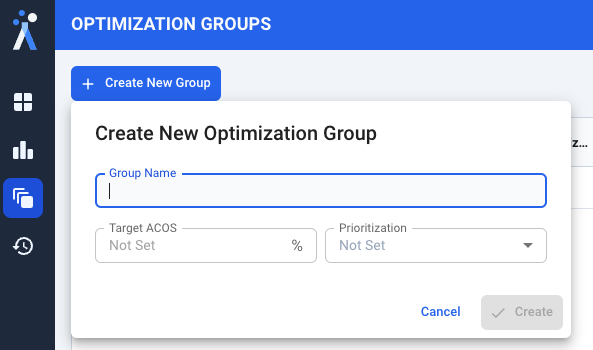
3️⃣ Name your grouping, set your target and prioritization, then click "Create"
4️⃣ Once you have created your Optimization Groups, you will be able to see them listed in a grid format, with the ability to quickly change your settings and targets from this view.
5️⃣ When you're happy with all your settings, you can navigate back to the Optimizer grid, utilize the filters to narrow your campaigns, then select and add to the appropriate group. Follow the above instructions to complete this process.
💡 Note: You can only ever add one given campaign to one optimization group.
