Help Article Contents:
How to Create Tags
Manual Tag Creation
Bulk Tag Creation
Assigning Tags in Your AdLabs Account
Using Tags for Data Analysis
Adding to Tables & Grouping
Filtering for Tags
Tags are one of the most overlooked features inside of AdLabs that provide a ton of value, and make slicing and dicing your data easier than ever!
With Tags, there are endless customization capabilities, and in this article we will simply show you how to set up your tags and apply them to the different parts of your account.
We will also go through some use-cases and examples of Tags that AdLabs users frequently use.
There are two main ways that you can create tags:
1⃣ Manually, one at a time
2⃣ Using a bulk upload template
Let’s break down the step-by-step process for each so that you can quickly get started setting up tags.
You can manually create tags in a couple of different locations. To start, first navigate to the Tabs dashboard under the ‘Analyze’ section of the sidebar menu in AdLabs.
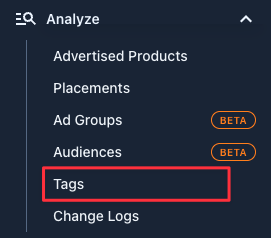
From this dashboard, you will click on ‘Create New Tag’.
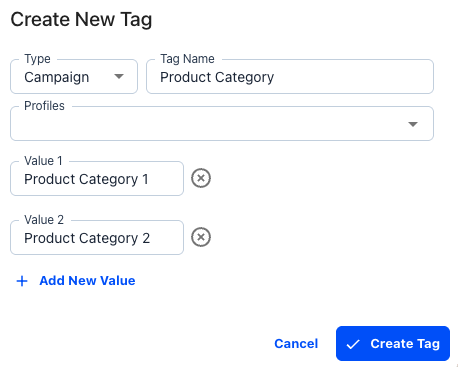
Begin by choose the type of Tag you want to create. You can create tags across different levels of the account, including:
Profile
Products
Campaign
Targets
Search Terms
Ad Groups
Choose the tag type, and input details for all of the available fields, then click ‘Create Tag’.
Now, let’s demonstrate how you can do this process in bulk.
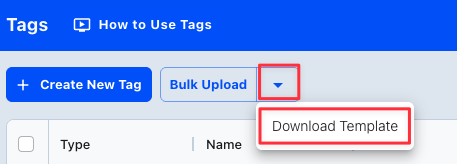
To create Tags in bulk, you will first need to download the bulk upload template (shown below).
The bulk upload file will allow you to create multiple tags and types of tags at once. The file should look like this:
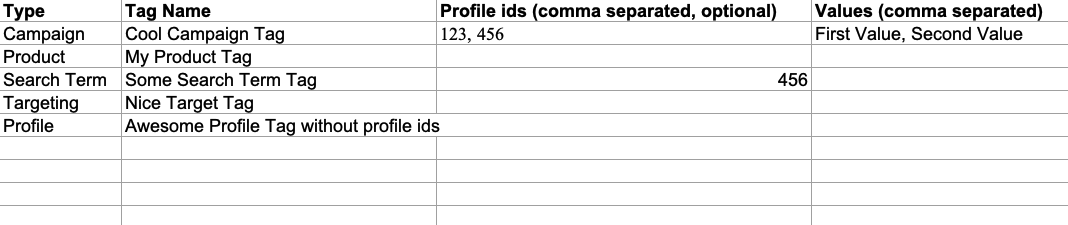
The template shows you what the inputs for ‘Type’ could be, similarly to what you see when manually creating the tags.
You’ll work from left-to-right where each row represents a separate tag configuration.
You will define the following:
Tag Type
Tag Name
Profile ID (you can leave this blank and assign after upload)
Tag Values
The ‘Tag Values’ column must be a common-separated list.

Once you’ve defined the tags and prepared the bulk template for upload, save the document, then come back to AdLabs to upload.
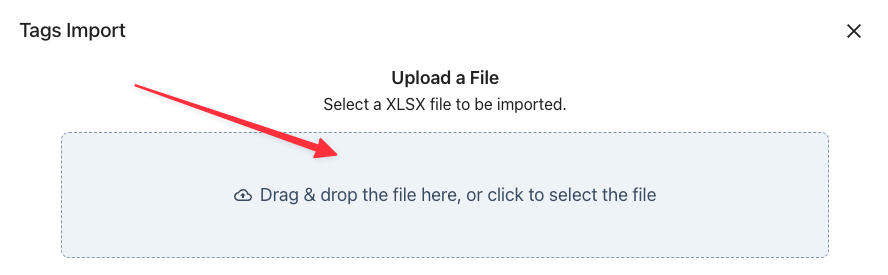
Drag and drop the saved file into the upload box, or click and find the file on your desktop.
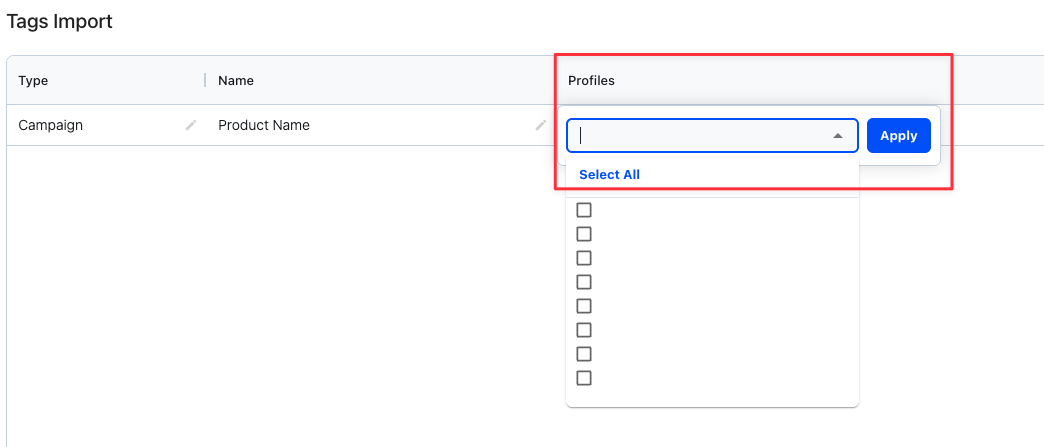
Once you’ve uploaded the file, you will be immediately redirected to a ‘Tags Import’ screen where you can preview the results and make sure everything uploaded properly.
In this view, you will assign which profiles you want the Tag to apply to. Click the dropdown and select the profile(s) from the list and hit ‘Apply’.
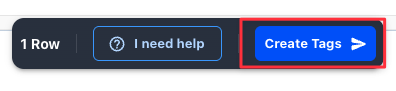
Once you’ve reviewed all the details, hit ‘Create Tags’ in the action menu at the bottom of the screen.
You will be redirected back to the Tags overview dashboard where you can see all the different Tags you have created.
Once you’ve created your tags, the next step is to assign them throughout your account.
To assign tags, you will need to navigate to the corresponding section of the account in AdLabs.
To assign Product Tags > Products Overview
To assign Campaign Tags > Campaign Optimizer
To assign Target Tags > Targeting
Etc.
To assign the Tags, you will select the rows you want to assign.
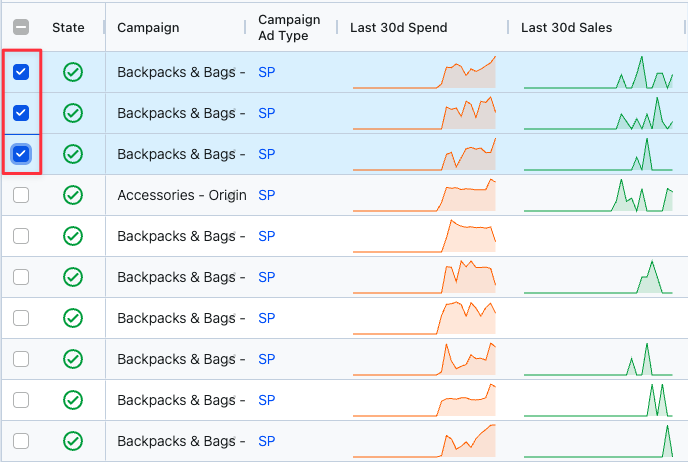
Once selected, in the Action Menu at the bottom of the screen, click ‘Tags’.

This will bring up a box where you can select the Tag you want to apply. You will choose the appropriate Tag you want to apply and define what value to assign to the entity from the dropdown menus.
Once you’ve made the selection, hit ‘Assign value to Entities’ to apply the tag.
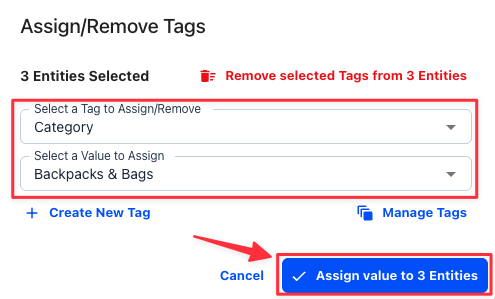
From this dialog box you will see you can also manually create tags by clicking ‘Create New Tag’ once you have selected rows from the table.
Once you’ve gone through and assigned tags throughout your account, you will then be able to make use of them in a couple different ways.
Tags allow you to sort, cut and drill into data more effectively, giving you a clear understanding of you account’s performance.
The first way to start using tags is to add them to the table.
You can add the Tags to the table by clicking on the ‘Columns’ selector button.
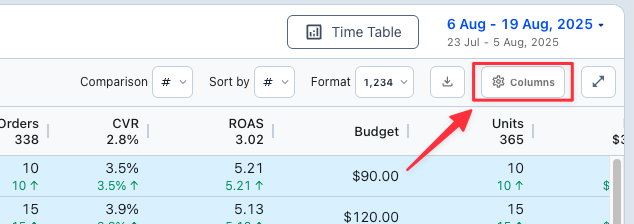
In the Column Selector, you will see the different tags you have available.
This view will look different based on the dashboard you are looking at. For example, in the Campaign Optimizer dashboard, you will see a ‘C’ next to all of your campaigns tags.
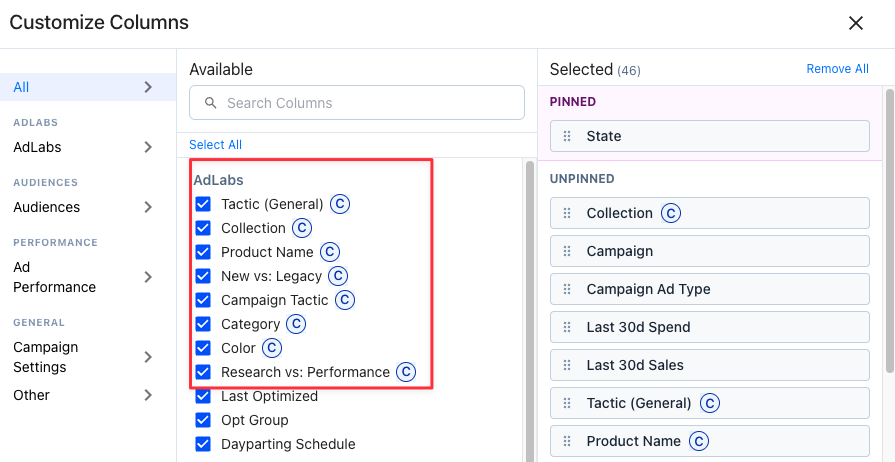
Select the ones you want to add to the table and hit ‘Apply’.
You will then see all of the Tags you added to the table as shown below.
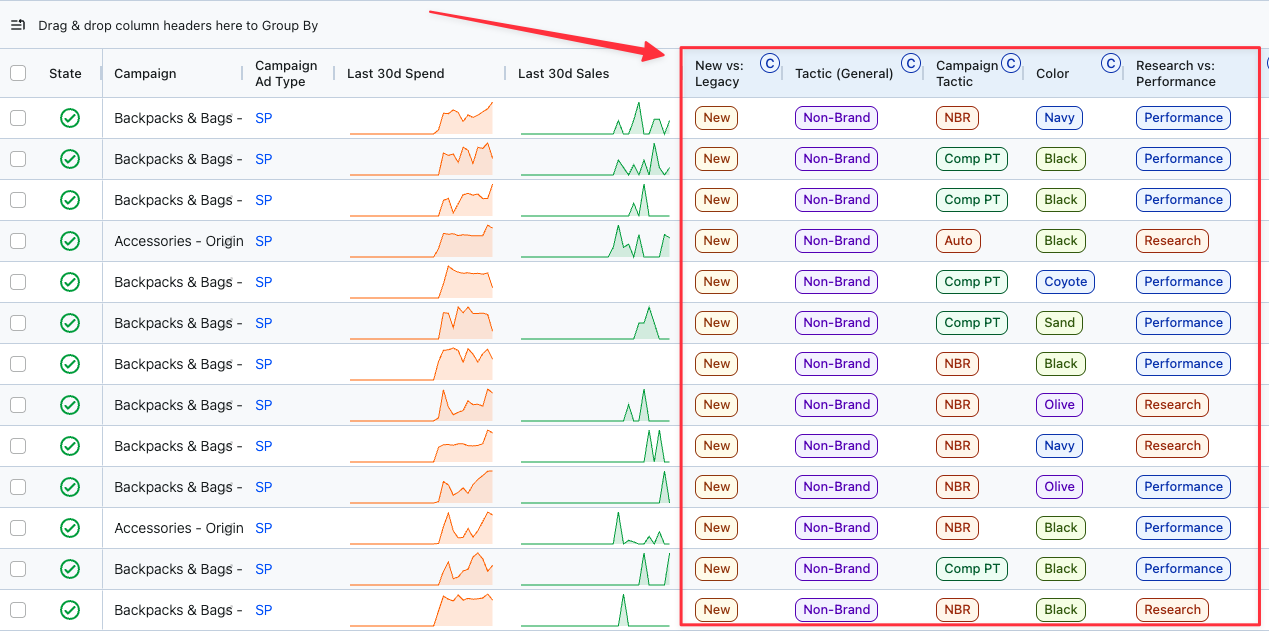
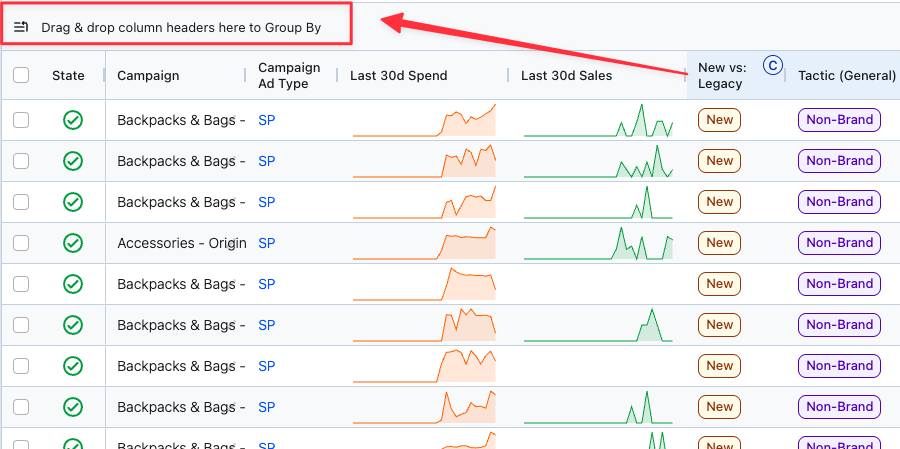
Once added to the table, you can begin to use the ‘Drag & drop’, instant pivot table feature in AdLabs to group up your data using the Tags.
Simply click and drag the column header into the ‘Drag & drop column headers here to Group By’ section of the table.
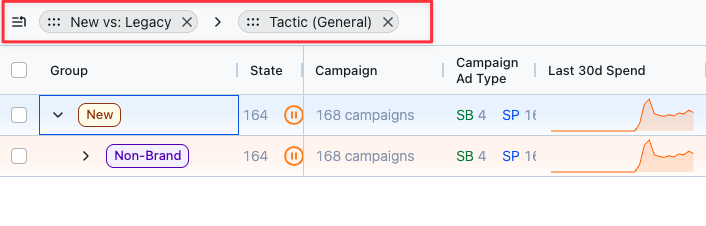
You can create groups, and sub-groups to begin to drill down into the data as shown below. This is an extremely valuable and efficient way to begin to dive deep into the different segments of your account and understand your data.
Tags also make for excellent filters.
Tags allow you to filter down to just a particular segment of your account and visualize only the data associate with the Tag.
To filter for Tags, first simply click the ‘Filters’ button on the top of the table you are analyzing.

Search or scroll until you find the ‘Tags’ option in the dropdown menu.
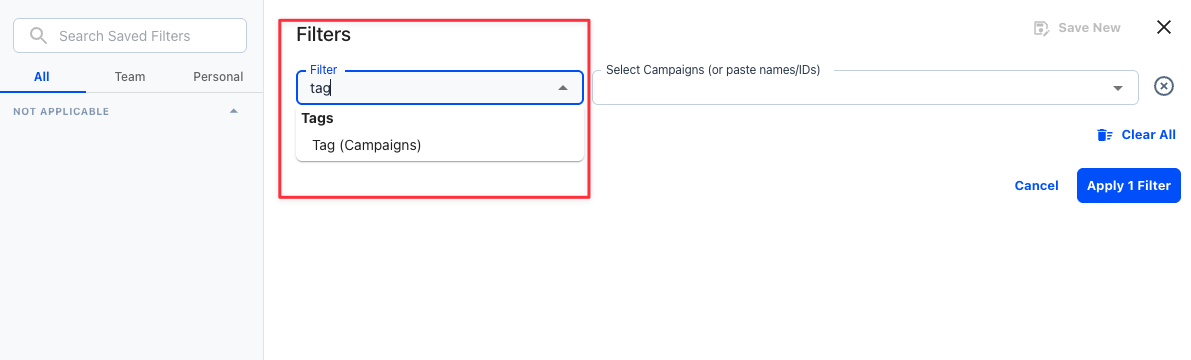
In the second dropdown, you can pick one or multiple tags to filter by, then simply hit ‘Apply’.
All entities in the table will then be filtered out if they do not include the Tags you have selected. All data in the chart will be representative of the Tags selected.
Here are a few ideas for ways you might utilize tags.
Product Tags:
Product Category & Sub-Category
Color
Size
Unique Classifications (usually dictated by client)
New Launches vs Seasoned Products
Ad Supported Products vs: Non-Ad Supported
Priority or Seasonality
Campaign Tags:
Product Category & Sub-Category
Campaign Tactic (Brand vs: Non-Brand vs: Competitor)
Keyword Groupings
Sponsored Brand Creative Type (Video vs: Product Collection)
New vs: Legacy Campaigns (when relaunching)
Targeting & Search Terms:
Tactic (Brand vs: Non-Brand)
Keyword Funnel Stage (Top of Funnel, Bottom of Funnel, etc.)
Query Length (Short Tail, Long Tail)
Tags are a powerful yet often underutilized feature inside of AdLabs.
When used correctly, they can dramatically improve your ability to organize, analyze, and take action on your Amazon advertising data.
Whether you’re assigning Tags manually, uploading them in bulk, or using them to filter and group your tables, the flexibility and customization they offer can streamline your workflow and unlock deeper insights.
If you have any questions about setting up or using Tags in your account, don’t hesitate to reach out to our support team — we’re always here to help!
